⬇️
Download and run the DetectNix Vision installer
Double-click the Detectnix DetectNix Vision setup file that was downloaded to your computer.
Download started
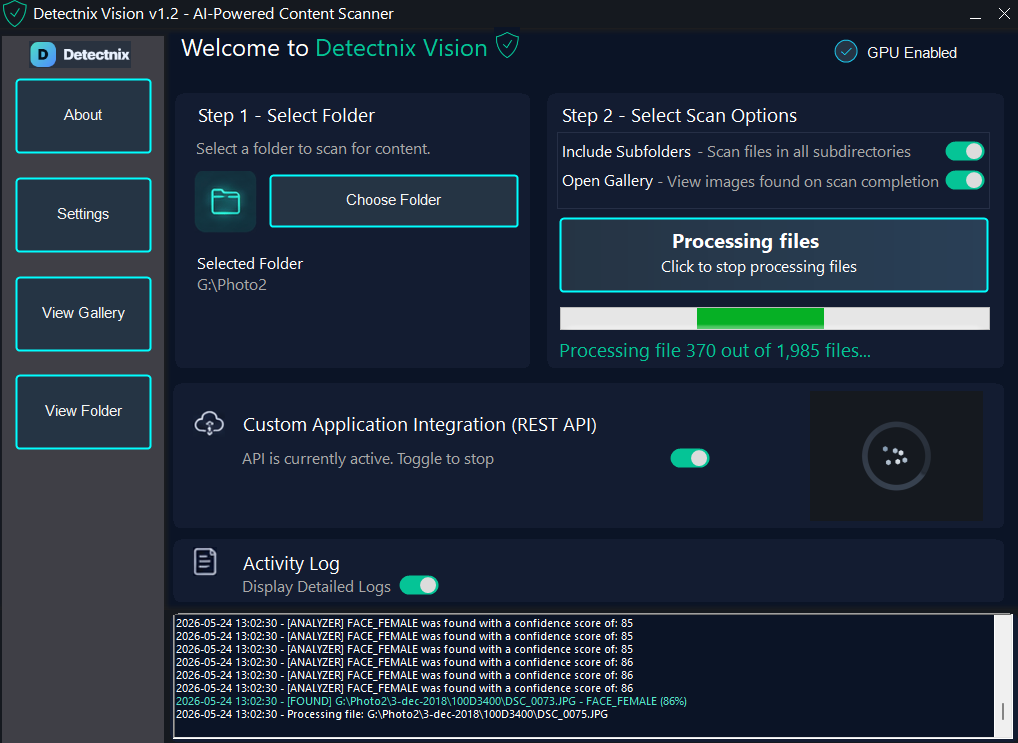
Follow the steps below to install your Detectnix software, activate your licence, and start scanning image collections locally on your Windows computer.
Step 1
Run the installer for your DetectNix Software and then follow the setup wizard. Once installation is complete, launch the Detectnix Software from your desktop shortcut or the Windows Start Menu.
Double-click the Detectnix DetectNix Vision setup file that was downloaded to your computer.
Your Detectnix Software is a new application and may trigger a Windows SmartScreen warning. To continue, click More info and then Run anyway.
This warning appears because the software is newly released and has not yet built a reputation with Microsoft SmartScreen.
Complete the setup wizard, then open the Detectnix Software from the desktop or Start Menu.
Step 2
Retail and Enterprise customers receive a licence key by email after purchase. Follow the steps below to activate your software.
STEP 1
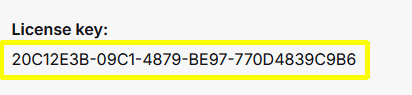
Open your purchase confirmation email and copy the licence key
provided for your Detectnix Software
.
STEP 2
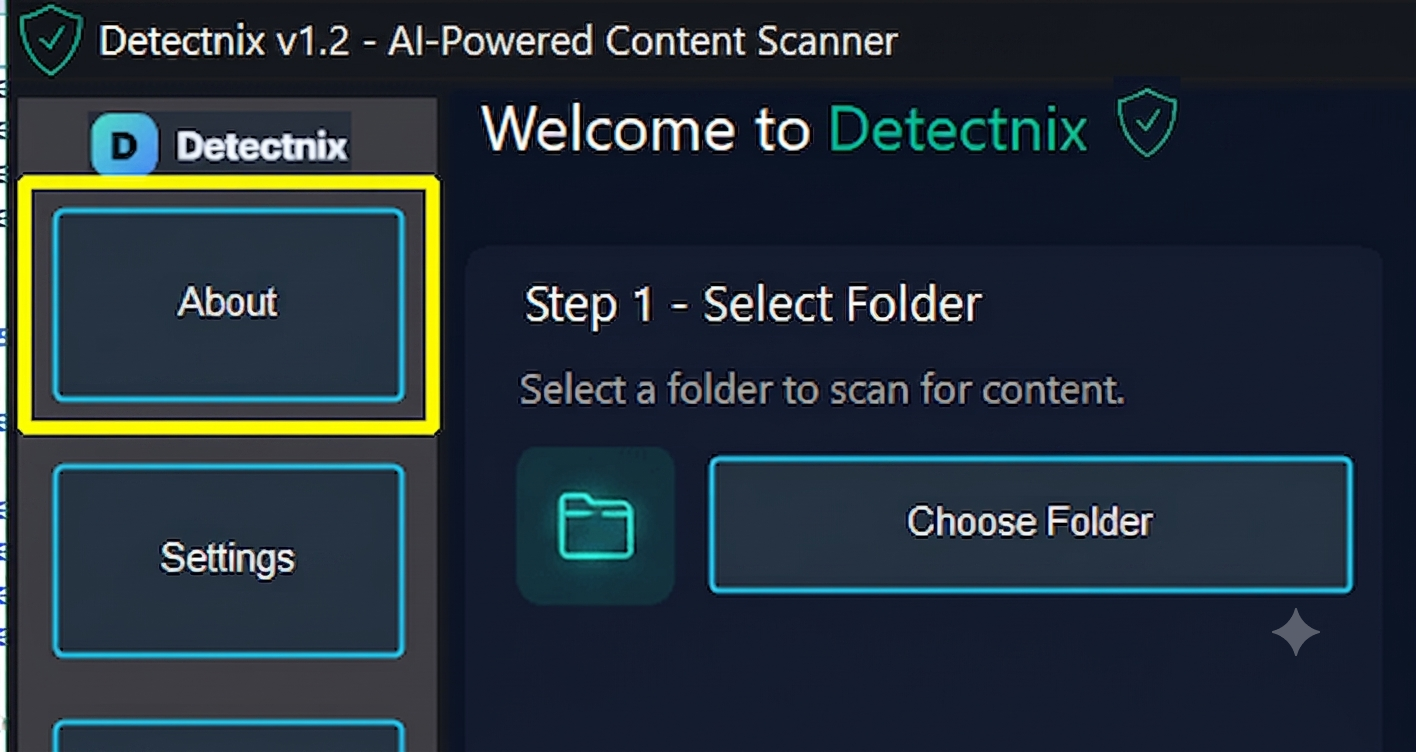
Launch your Detectnix Software and click the About button from the main menu.
STEP 3
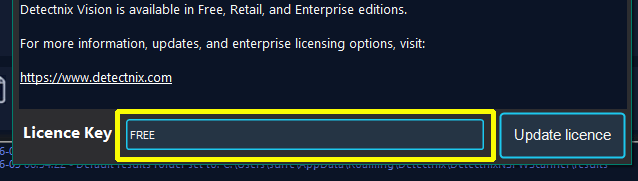
Paste the licence key copied from your email into the licence field and click Update Licence to activate your software.
Step 3
Choose the folder that contains the images you want your Detectnix Software to scan.
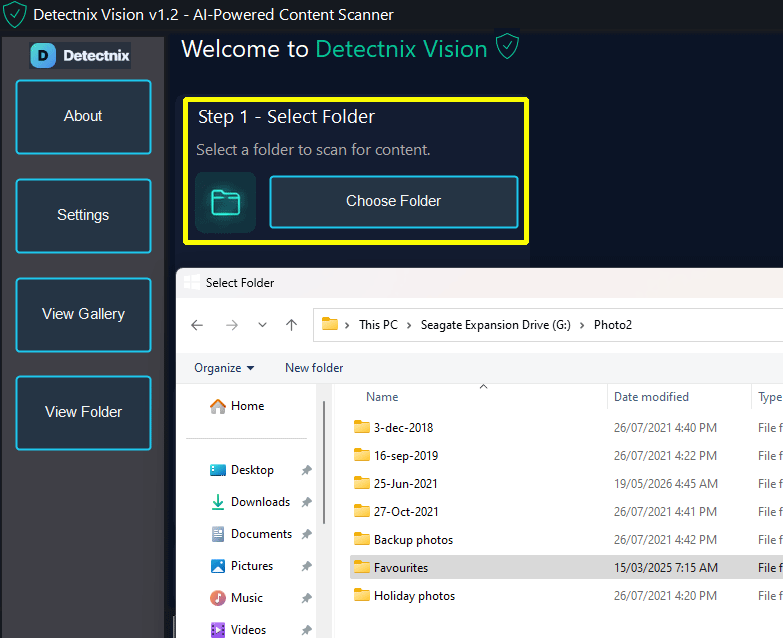
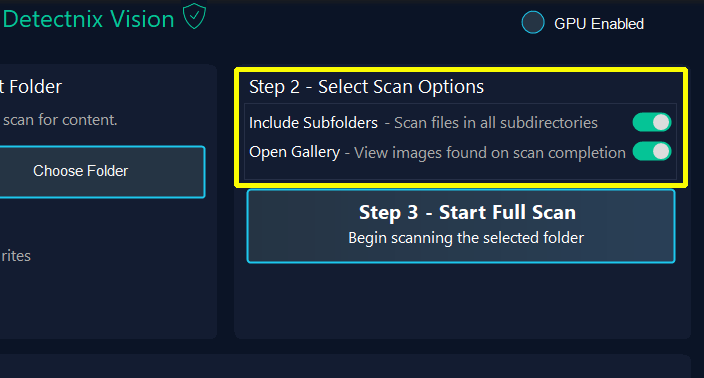
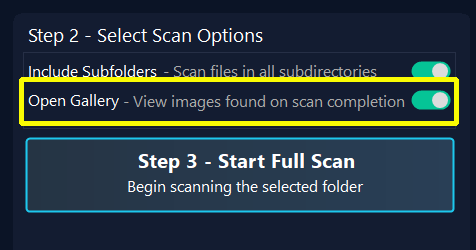
Configure your scan options before starting. Retail and Enterprise editions can scan subfolders.
Clicking on the Settings Button will bring up the advanced setting menu.
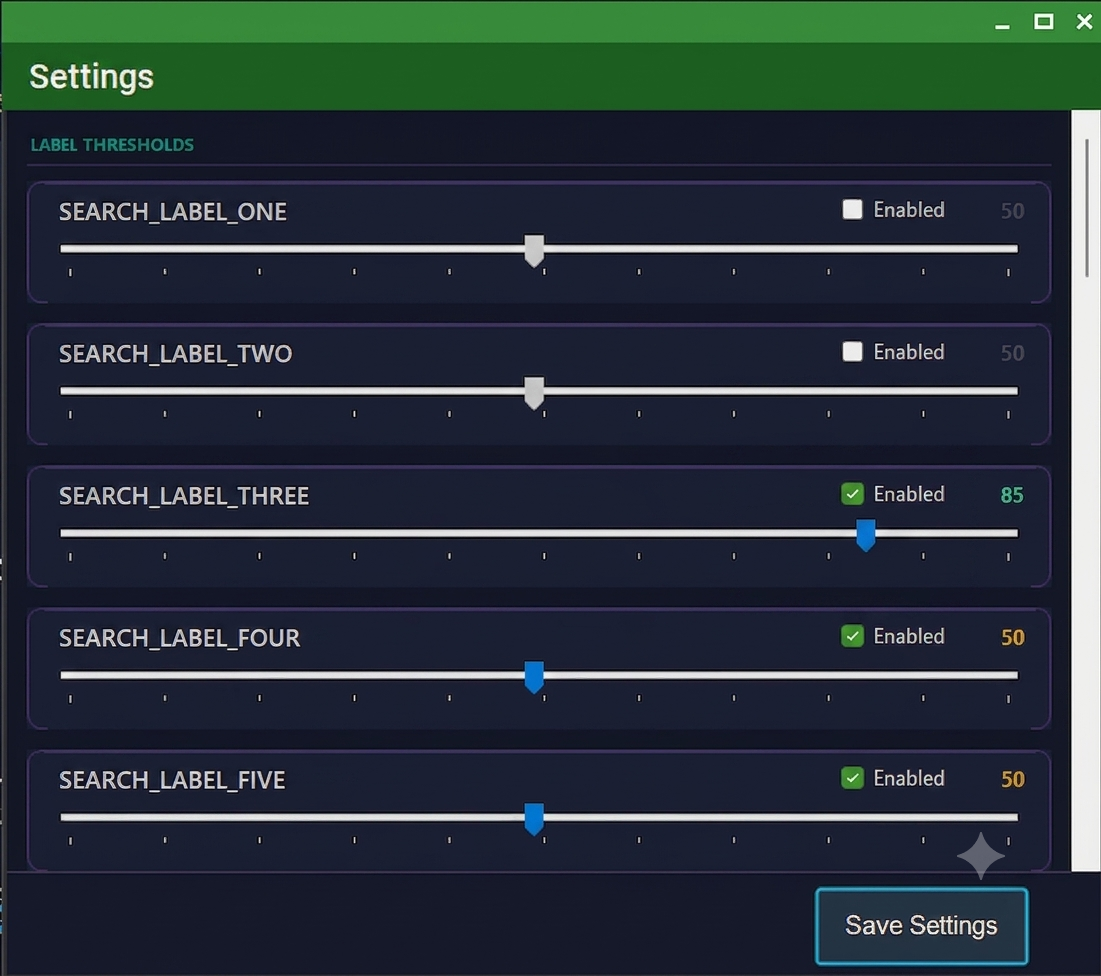
Use the sliders to adjust the detection threshold for each category. Higher values (closer to 100%) require greater confidence before an image is flagged, resulting in fewer false positives.
To disable detection for a category, clear its corresponding Enabled checkbox.
Specify the minimum file size, in kilobytes (KB), to scan. Files smaller than the configured size will be excluded from processing.
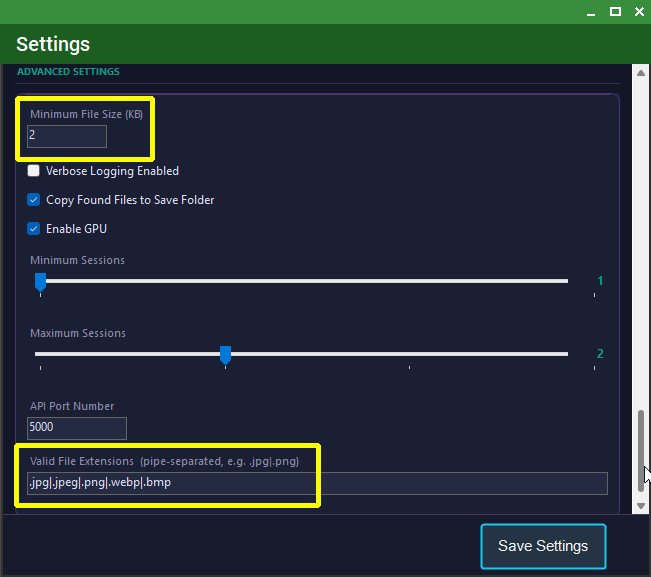
Specify the image file extensions to include in the scan. Only files with one of the selected extensions will be processed.
Click Start Full Scan to begin scanning for adult content. Click the button again at any time to cancel the scan.
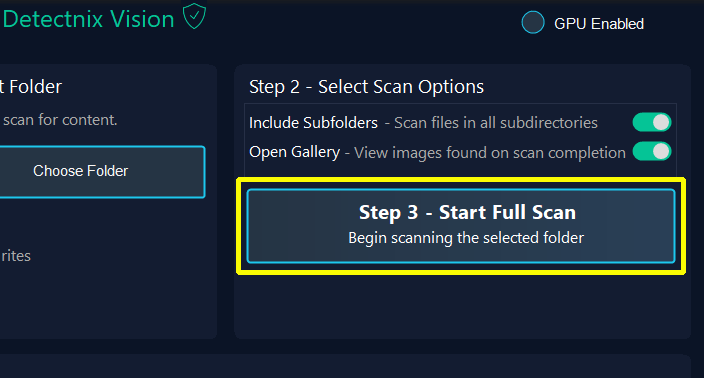
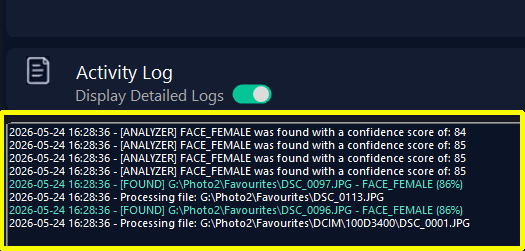
Scan progress and image validation details are displayed in the Activity Log window.
If Open Gallery was selected when configuring the scan options in Step 2:
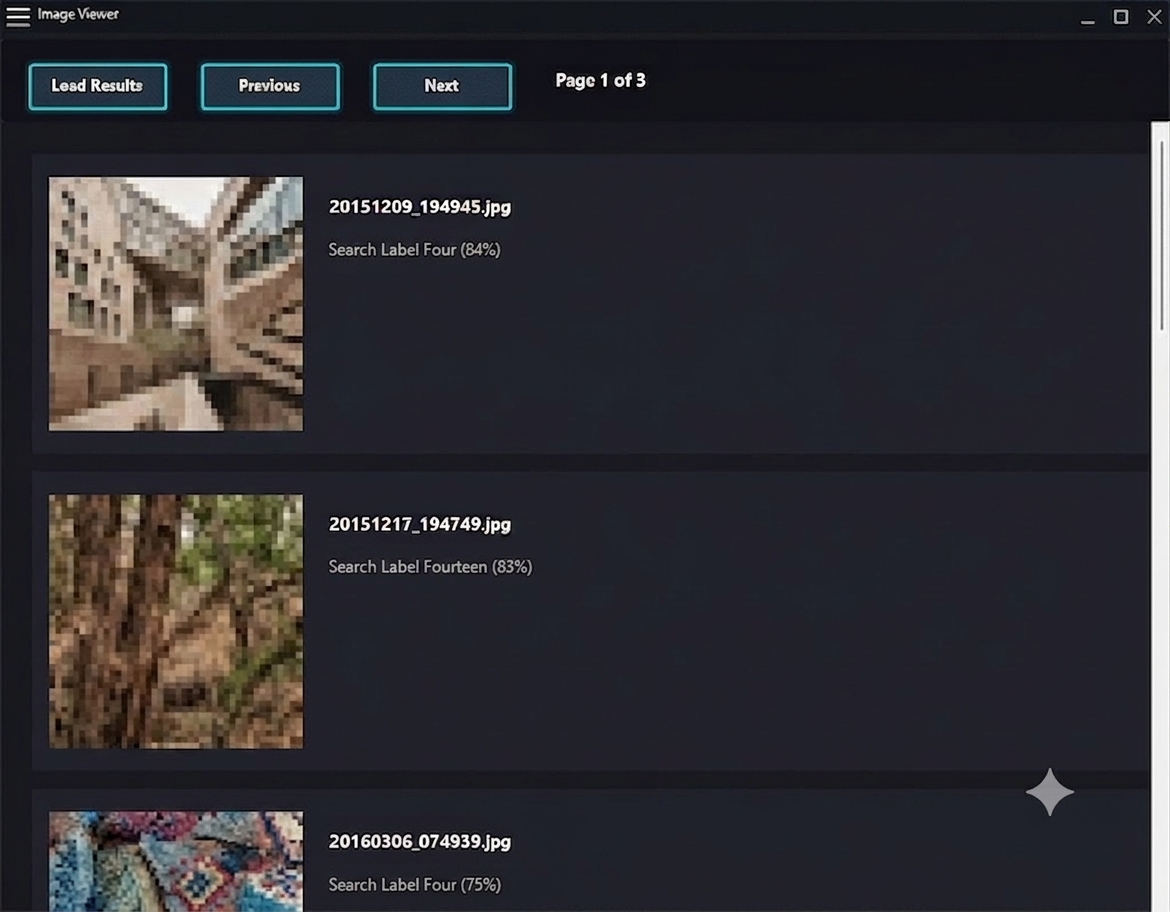
The image gallery will open, allowing you to review detected content.
Right-click any image to access additional file management options.
Need help?
If you need help installing your Detectnix Software or activating your licence, please contact Detectnix support.